Introduction to White Chocolate Covered Oreos
As a busy mom, I know how precious time can be, especially when it comes to whipping up something sweet. That’s why I absolutely adore making White Chocolate Covered Oreos. They’re not just a treat; they’re a delightful escape from the daily grind. With just a few simple ingredients, you can create a dessert that impresses everyone, from your kids to your friends. Whether it’s a last-minute gathering or a cozy night in, these cookies are the perfect solution. Trust me, once you try them, you’ll be hooked!
Why You’ll Love This White Chocolate Covered Oreos
These White Chocolate Covered Oreos are a game-changer for busy lives. They come together in just 20 minutes, making them a quick and easy dessert option. The creamy white chocolate perfectly complements the classic Oreo crunch, creating a taste sensation that’s hard to resist. Plus, they’re versatile! You can customize them with your favorite toppings, making each batch uniquely yours. Who wouldn’t love that?
Ingredients for White Chocolate Covered Oreos
Gathering the right ingredients is the first step to creating these delightful White Chocolate Covered Oreos. Here’s what you’ll need:
- Oreo cookies: The star of the show! These classic cookies provide the perfect crunch and flavor.
- White chocolate chips: This creamy goodness is what makes the Oreos irresistible. You can use any brand you prefer.
- Coconut oil (optional): Adding a tablespoon can help thin the chocolate, making it easier to dip. Plus, it adds a subtle tropical flavor!
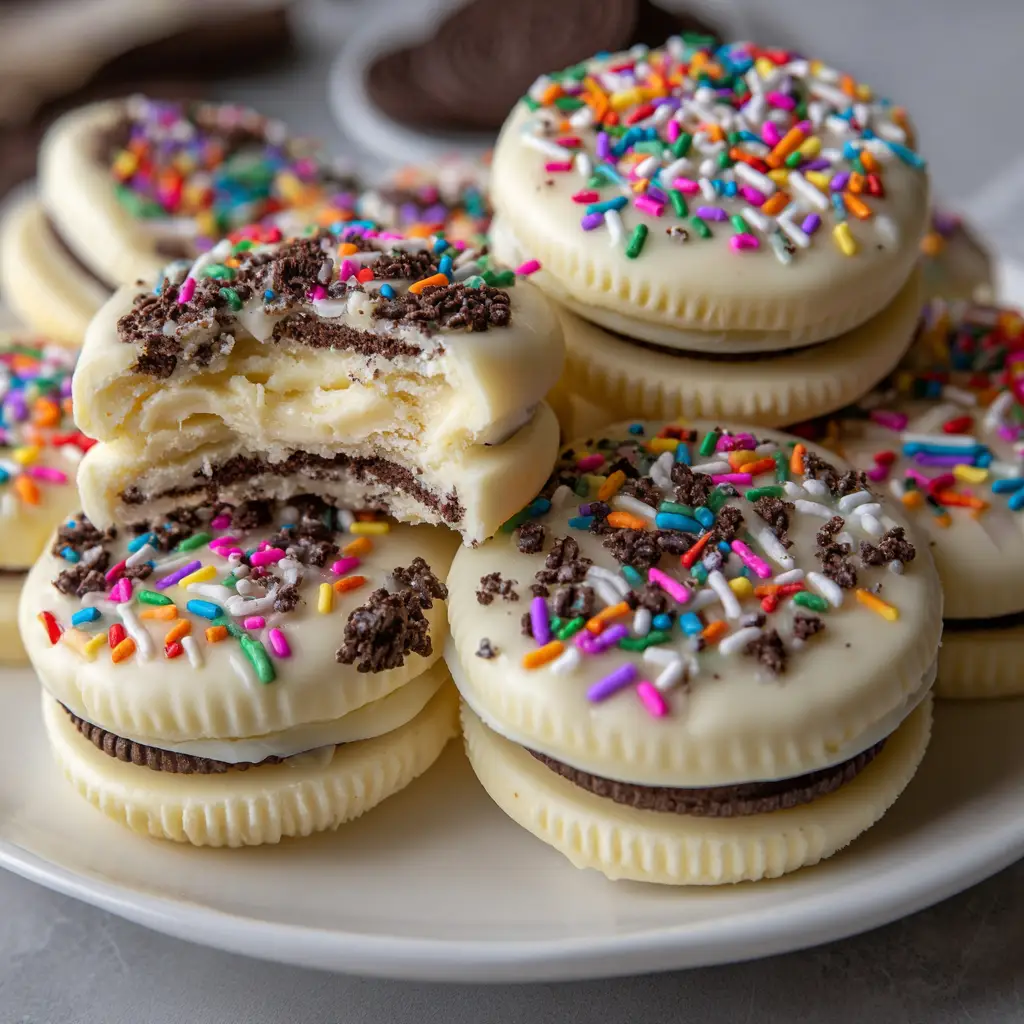
- Sprinkles or toppings (optional): Get creative! Use colorful sprinkles, crushed nuts, or even drizzles of colored chocolate for a festive touch.
For exact measurements, check the bottom of the article where you can find everything listed for easy printing. Enjoy the process of gathering these ingredients, and let your creativity shine!
How to Make White Chocolate Covered Oreos
Now that you have your ingredients ready, let’s dive into the fun part—making these delightful White Chocolate Covered Oreos! Follow these simple steps, and you’ll have a batch of sweet treats in no time.
Step 1: Prepare Your Baking Sheet
Start by lining a baking sheet with parchment paper. This makes cleanup a breeze and prevents the cookies from sticking. Just lay the parchment flat, ensuring it covers the entire surface. It’s like giving your cookies a cozy bed to rest on!
Step 2: Melt the White Chocolate
Next, grab a microwave-safe bowl and pour in your white chocolate chips. Microwave them in 30-second intervals, stirring in between. This helps the chocolate melt evenly without burning. If you want a smoother consistency, add a tablespoon of coconut oil. It’s like giving your chocolate a silky makeover!
Step 3: Dip the Oreos
Now comes the fun part! Take each Oreo and dip it into the melted white chocolate. Make sure to coat it fully, so every bite is a creamy delight. I like to use a fork to help lift the cookie out, letting any excess chocolate drip off. It’s like giving your Oreos a luxurious spa treatment!
Step 4: Place on Baking Sheet
Carefully place the coated Oreos on your prepared baking sheet. Make sure to leave a little space between each cookie. This way, they won’t stick together as they set. Think of it as giving each cookie its own personal space!
Step 5: Add Toppings
If you’re feeling creative, now’s the time to sprinkle on your toppings! Whether it’s colorful sprinkles, crushed nuts, or a drizzle of colored chocolate, this is your chance to make each cookie unique. Just remember to do this while the chocolate is still wet, so the toppings stick!
Step 6: Refrigerate
Pop the baking sheet into the refrigerator for about 30 minutes. This is crucial for letting the chocolate harden. It’s like putting your cookies in a cool spa to relax and set. You’ll know they’re ready when the chocolate feels firm to the touch.
Step 7: Enjoy!
Once the chocolate has hardened, it’s time to indulge! Take a moment to admire your beautiful creations before diving in. Each bite of these White Chocolate Covered Oreos is a sweet reward for your efforts. Enjoy every delicious morsel!
Tips for Success
- Make sure your chocolate is fully melted for a smooth coating.
- Use a fork to dip the Oreos for easy handling and less mess.
- Experiment with different toppings to keep things exciting!
- Don’t rush the refrigeration; let the chocolate set completely.
- Store any leftovers in an airtight container to keep them fresh.
Equipment Needed
- Microwave-safe bowl: Any heatproof bowl will do if you don’t have one.
- Parchment paper: Wax paper can be a substitute, but parchment is best.
- Fork: A slotted spoon works well for dipping too.
- Baking sheet: A regular plate can be used if you’re in a pinch.
Variations
- Dark Chocolate Covered Oreos: Swap white chocolate for dark chocolate for a richer flavor.
- Minty Delight: Add a few drops of peppermint extract to the melted chocolate for a refreshing twist.
- Nutty Crunch: Incorporate crushed almonds or walnuts into the melted chocolate for added texture.
- Gluten-Free Option: Use gluten-free Oreo cookies to make this treat suitable for those with dietary restrictions.
- Seasonal Flavors: Try adding pumpkin spice or cinnamon for a festive fall treat!
Serving Suggestions
- Pair your White Chocolate Covered Oreos with a glass of cold milk for a classic combo.
- Serve them on a decorative platter for a beautiful presentation at parties.
- For a fun twist, stack them in a mason jar as a delightful gift.
- Enjoy with a cup of coffee or tea for a cozy afternoon treat.
FAQs about White Chocolate Covered Oreos
Can I use other types of chocolate?
Absolutely! While I love the creamy sweetness of white chocolate, you can easily swap it for dark or milk chocolate. Each variation brings its own unique flavor to the table!
How long do these cookies last?
When stored in an airtight container, your White Chocolate Covered Oreos can last up to a week. But trust me, they’ll likely be gone much sooner!
Can I make these ahead of time?
Yes! These cookies are perfect for making ahead. Just prepare them, refrigerate, and store them in an airtight container until you’re ready to enjoy or serve them.
What toppings work best?
The sky’s the limit! I love using colorful sprinkles, crushed nuts, or even drizzles of colored chocolate. Get creative and make them your own!
Are these cookies suitable for kids?
Definitely! Kids adore these sweet treats. They’re fun to make together, and you can let them choose their favorite toppings. It’s a great way to bond in the kitchen!
Final Thoughts
Making White Chocolate Covered Oreos is more than just a recipe; it’s a delightful experience that brings joy to both the cook and the lucky recipients. The simplicity of the process allows for creativity, making it a perfect activity for busy moms like me. Each bite is a sweet reminder of the little pleasures in life. Whether you’re celebrating a special occasion or just treating yourself, these cookies are sure to bring smiles. So, gather your ingredients, invite your loved ones to join in, and create some delicious memories together. Happy baking!
Print
White Chocolate Covered Oreos: A Sweet Delight Awaits!
- Prep Time: 15 minutes
- Cook Time: 5 minutes
- Total Time: 20 minutes
- Yield: 24 cookies 1x
- Category: Dessert
- Method: No-Bake
- Cuisine: American
- Diet: Vegetarian
Description
White Chocolate Covered Oreos are a delicious treat that combines the classic Oreo cookie with a rich layer of white chocolate, making them perfect for any occasion.
Ingredients
- 1 package of Oreo cookies
- 2 cups of white chocolate chips
- 1 tablespoon of coconut oil (optional)
- Sprinkles or toppings (optional)
Instructions
- Prepare a baking sheet by lining it with parchment paper.
- Melt the white chocolate chips in a microwave-safe bowl, stirring every 30 seconds until smooth. If desired, add coconut oil to thin the chocolate.
- Dip each Oreo cookie into the melted white chocolate, ensuring it is fully coated.
- Place the coated Oreos on the prepared baking sheet.
- If using, sprinkle toppings on the wet chocolate before it sets.
- Refrigerate the cookies for about 30 minutes or until the chocolate hardens.
- Enjoy your White Chocolate Covered Oreos!
Notes
- Store in an airtight container for up to a week.
- Experiment with different toppings like crushed nuts or colored sprinkles.
- For a festive touch, use colored white chocolate for holidays.
Nutrition
- Serving Size: 1 cookie
- Calories: 150
- Sugar: 10g
- Sodium: 50mg
- Fat: 7g
- Saturated Fat: 4g
- Unsaturated Fat: 2g
- Trans Fat: 0g
- Carbohydrates: 20g
- Fiber: 1g
- Protein: 1g
- Cholesterol: 0mg


