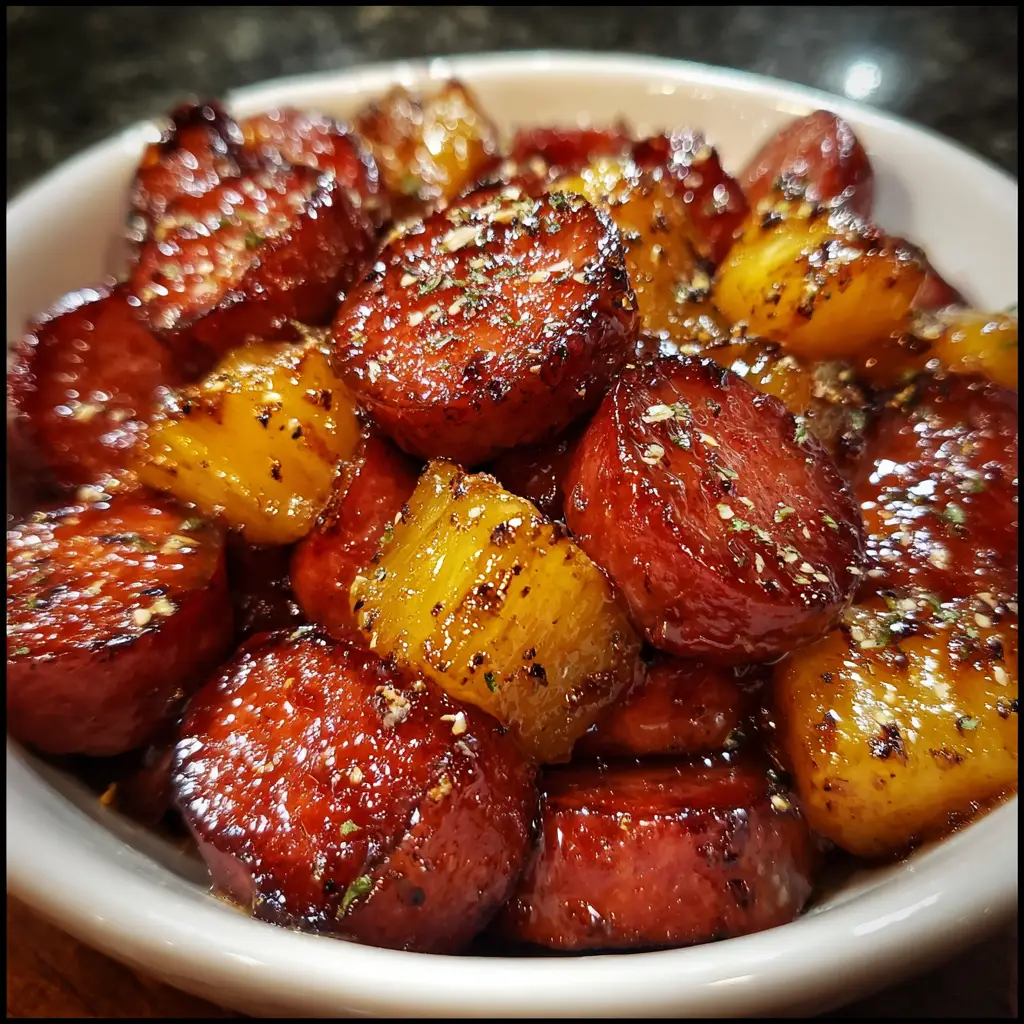
Introduction to Glazed Kielbasa Pineapple Bites
As a busy mom, I know how challenging it can be to whip up something delicious that everyone will love. That’s where my Glazed Kielbasa Pineapple Bites come in! These little gems are not only a breeze to make, but they also pack a punch of flavor that will impress your family and friends. Imagine the sweet and savory combination of juicy pineapple and smoky kielbasa, all wrapped up in a sticky glaze. Perfect for parties or a cozy night in, this recipe is your go-to solution for satisfying cravings without the fuss!
Why You’ll Love This Glazed Kielbasa Pineapple Bites
These Glazed Kielbasa Pineapple Bites are a lifesaver for busy days! They come together in just 40 minutes, making them perfect for last-minute gatherings. The delightful blend of sweet and savory flavors will have everyone coming back for more. Plus, they’re easy to prepare, so you can spend less time in the kitchen and more time enjoying the company of your loved ones. What’s not to love?
Ingredients for Glazed Kielbasa Pineapple Bites
Gathering the right ingredients is the first step to creating these delightful Glazed Kielbasa Pineapple Bites. Here’s what you’ll need:
- Kielbasa: This savory sausage is the star of the show. It adds a rich, smoky flavor that pairs beautifully with the sweetness of pineapple.
- Pineapple Chunks: Fresh or canned, these juicy bites bring a burst of sweetness. They balance the savory kielbasa perfectly.
- Brown Sugar: This ingredient gives the glaze its sticky sweetness. It caramelizes beautifully in the oven, creating a mouthwatering coating.
- Soy Sauce: A splash of soy sauce adds depth and umami to the glaze. It enhances the overall flavor profile, making each bite irresistible.
- Dijon Mustard: Just a tablespoon adds a tangy kick that cuts through the sweetness. It’s a secret weapon for flavor!
- Garlic Powder: This brings a warm, aromatic essence to the dish. It’s a must for that extra layer of flavor.
- Black Pepper: A dash of black pepper adds a subtle heat that complements the sweetness of the glaze.
For those who like a little heat, consider adding a dash of cayenne pepper to the glaze. If you’re looking for a gluten-free option, make sure to choose gluten-free soy sauce. You can find the exact measurements for these ingredients at the bottom of the article, ready for printing!
How to Make Glazed Kielbasa Pineapple Bites
Now that you have your ingredients ready, let’s dive into the fun part: making these Glazed Kielbasa Pineapple Bites! Follow these simple steps, and you’ll have a delicious appetizer that will wow your guests.
Step 1: Preheat the Oven
First things first, preheat your oven to 350°F (175°C). Preheating is crucial because it ensures even cooking. You want those flavors to meld perfectly, and starting with a hot oven helps achieve that.
Step 2: Prepare the Glaze
In a large bowl, mix together the brown sugar, soy sauce, Dijon mustard, garlic powder, and black pepper. As you stir, you’ll notice the sweet and savory aromas coming together. This glaze is what makes the Glazed Kielbasa Pineapple Bites so irresistible!
Step 3: Combine Kielbasa and Pineapple
Now, it’s time to add the sliced kielbasa and drained pineapple chunks to the bowl. Toss everything together until each piece is well-coated in that luscious glaze. This step is where the magic happens, as the flavors start to mingle.
Step 4: Transfer to Baking Dish
Next, transfer the mixture to a baking dish. Spread it out evenly to ensure everything cooks uniformly. If you want those bites to caramelize nicely, make sure they’re not overcrowded in the dish. A little space goes a long way!
Step 5: Bake to Perfection
Pop the baking dish into your preheated oven and let it bake for 25-30 minutes. Halfway through, give it a good stir. You’ll know they’re done when the kielbasa is heated through and the glaze is bubbly and sticky. Your kitchen will smell heavenly!
Step 6: Cool and Serve
Once they’re out of the oven, let the bites cool for a few minutes. This step is important for safety and flavor. You want to avoid burning your mouth on that delicious glaze! After cooling, serve them warm, and watch them disappear!
Tips for Success
- Make sure to drain the pineapple well to avoid excess moisture in the glaze.
- For a richer flavor, let the kielbasa marinate in the glaze for 30 minutes before baking.
- Use a non-stick baking dish for easy cleanup and to prevent sticking.
- Keep an eye on the baking time; ovens can vary, so adjust as needed.
- Serve with toothpicks for a fun, easy-to-eat appetizer!
Equipment Needed
- Baking Dish: A 9×13 inch dish works well, but any oven-safe dish will do.
- Mixing Bowl: A large bowl for combining the glaze and ingredients; a pot can work in a pinch.
- Measuring Cups and Spoons: Essential for accuracy; you can use a kitchen scale if you prefer.
- Spatula or Spoon: For mixing and serving; any sturdy utensil will suffice.
Variations of Glazed Kielbasa Pineapple Bites
- Spicy Kick: Add diced jalapeños or a dash of hot sauce to the glaze for a fiery twist.
- Sweet and Sour: Substitute half of the pineapple with bell peppers for a colorful and tangy variation.
- Herb Infusion: Mix in fresh herbs like cilantro or parsley for a burst of freshness.
- Turkey Kielbasa: Swap out traditional kielbasa for turkey kielbasa for a lighter option.
- Vegetarian Version: Replace kielbasa with plant-based sausage or tofu for a vegetarian-friendly appetizer.
Serving Suggestions for Glazed Kielbasa Pineapple Bites
- Pair with a refreshing fruit salad for a light, balanced meal.
- Serve alongside crispy potato wedges or sweet potato fries for a hearty touch.
- Complement with a tangy dipping sauce, like ranch or barbecue.
- Offer a selection of cocktails or mocktails to elevate your gathering.
- Present on a colorful platter with toothpicks for easy serving and a festive look.
FAQs about Glazed Kielbasa Pineapple Bites
As you prepare to make these Glazed Kielbasa Pineapple Bites, you might have a few questions. Here are some common queries I’ve encountered, along with helpful answers!
Can I make Glazed Kielbasa Pineapple Bites ahead of time?
Absolutely! You can prepare the mixture a day in advance and store it in the fridge. Just pop it in the oven when you’re ready to serve!
What can I serve with Glazed Kielbasa Pineapple Bites?
These bites pair wonderfully with a fresh salad, crispy potato wedges, or even a selection of dipping sauces. They’re versatile!
Can I use fresh pineapple instead of canned?
Yes, fresh pineapple works beautifully! Just make sure to cut it into bite-sized chunks for even cooking.
How do I store leftovers?
Store any leftovers in an airtight container in the fridge for up to three days. Reheat in the oven for the best texture!
Are Glazed Kielbasa Pineapple Bites gluten-free?
They can be! Just ensure you use gluten-free soy sauce, and you’re good to go. Enjoy these tasty bites without worry!
Final Thoughts
Making Glazed Kielbasa Pineapple Bites is more than just cooking; it’s about creating joyful moments with family and friends. The sweet and savory flavors dance together, bringing smiles and satisfied taste buds. I love how this recipe transforms simple ingredients into a crowd-pleaser, perfect for any occasion. Whether it’s a casual get-together or a festive celebration, these bites are sure to steal the show. So, roll up your sleeves, gather your loved ones, and enjoy the delightful experience of sharing these tasty treats. Trust me, they’ll be a hit every time!
Print
Glazed Kielbasa Pineapple Bites: A Tasty Party Hit!
- Prep Time: 10 minutes
- Cook Time: 30 minutes
- Total Time: 40 minutes
- Yield: 6 servings 1x
- Category: Appetizer
- Method: Baking
- Cuisine: American
- Diet: Gluten Free
Description
Glazed Kielbasa Pineapple Bites are a delicious and easy-to-make appetizer that combines savory kielbasa sausage with sweet pineapple, all coated in a sticky glaze. Perfect for parties and gatherings!
Ingredients
- 1 pound kielbasa, sliced into bite-sized pieces
- 1 can (20 oz) pineapple chunks, drained
- 1 cup brown sugar
- 1/2 cup soy sauce
- 1 tablespoon Dijon mustard
- 1 teaspoon garlic powder
- 1/2 teaspoon black pepper
Instructions
- Preheat the oven to 350°F (175°C).
- In a large bowl, mix together the brown sugar, soy sauce, Dijon mustard, garlic powder, and black pepper.
- Add the sliced kielbasa and pineapple chunks to the bowl, tossing to coat them in the glaze.
- Transfer the mixture to a baking dish, spreading it out evenly.
- Bake in the preheated oven for 25-30 minutes, stirring halfway through, until the kielbasa is heated through and the glaze is bubbly.
- Remove from the oven and let cool slightly before serving.
Notes
- For a spicier kick, add a dash of cayenne pepper to the glaze.
- These bites can be made ahead of time and reheated before serving.
- Serve with toothpicks for easy eating at parties.
Nutrition
- Serving Size: 1 serving
- Calories: 250
- Sugar: 15g
- Sodium: 800mg
- Fat: 15g
- Saturated Fat: 5g
- Unsaturated Fat: 10g
- Trans Fat: 0g
- Carbohydrates: 20g
- Fiber: 1g
- Protein: 10g
- Cholesterol: 30mg


