Introduction to Ghost OREO Ball Truffles a Must
As a busy mom, I know how hectic life can get, especially when Halloween rolls around. That’s why I’m excited to share my recipe for Ghost OREO Ball Truffles a must for your spooky celebrations! These delightful treats combine the classic taste of OREO cookies with a fun, ghostly twist. They’re not just easy to make; they’re also a hit with kids and adults alike. Whether you’re looking for a quick solution for a last-minute gathering or a fun project to do with your little ones, these truffles are sure to impress!
Why You’ll Love This Ghost OREO Ball Truffles a Must
These Ghost OREO Ball Truffles are a game-changer for busy days! They come together in just an hour, making them perfect for last-minute treats. The rich, creamy filling paired with the sweet white chocolate coating is simply irresistible. Plus, they’re a fun activity to share with your kids, creating sweet memories while you whip up these spooky delights. Trust me, they’ll vanish faster than you can say “Boo!”
Ingredients Ghost OREO Ball Truffles a Must
Gathering the right ingredients is the first step to creating these delightful Ghost OREO Ball Truffles. Here’s what you’ll need:
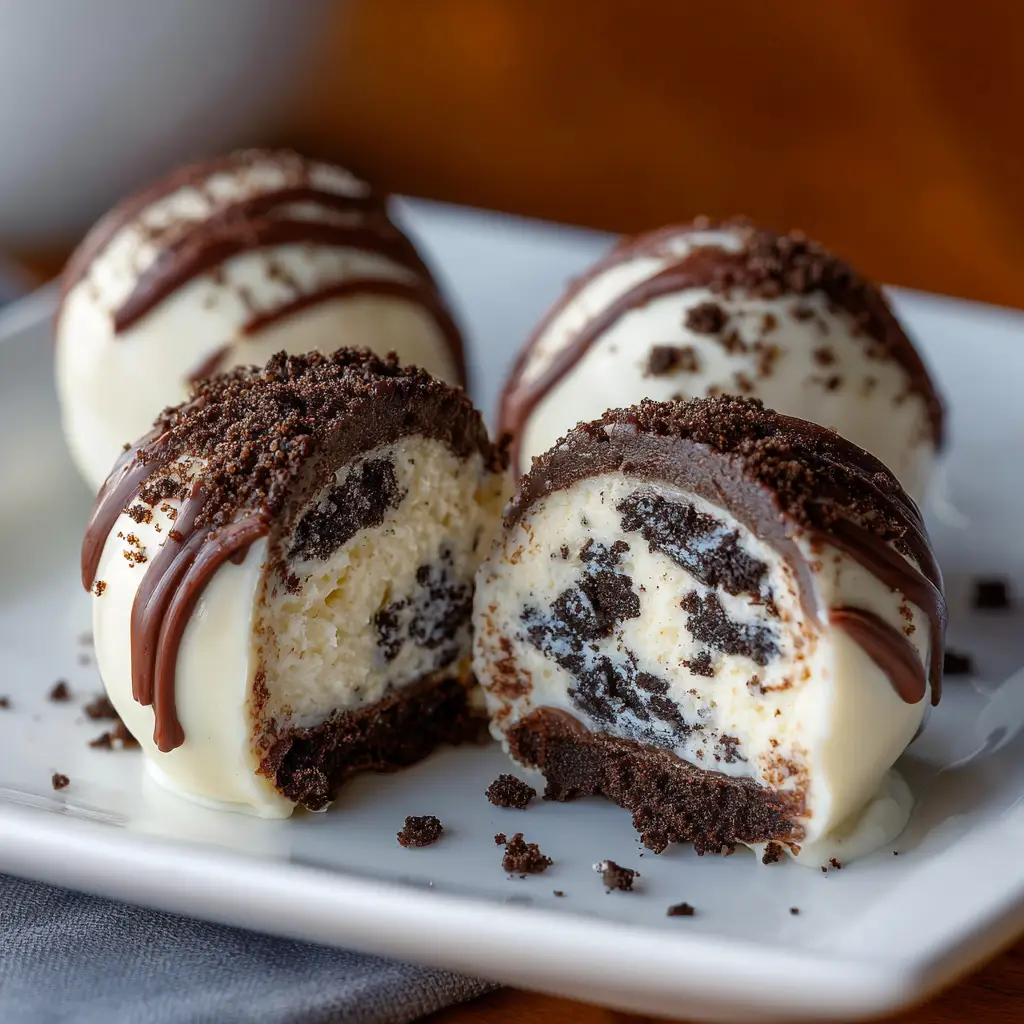
- OREO cookies: The star of the show! These classic cookies provide the rich, chocolatey flavor that makes these truffles so special. You can even use double-stuffed OREOs for an extra creamy filling.
- Cream cheese: This ingredient adds a smooth, rich texture to the truffles. Make sure it’s softened for easy mixing. It balances the sweetness of the cookies perfectly.
- White chocolate melting wafers: These are essential for coating the truffles. They melt smoothly and create a beautiful, ghostly finish. You can find them in most grocery stores or online.
- Black icing: This is for decorating your truffles with adorable ghost faces. You can use store-bought icing or make your own if you’re feeling adventurous!
For exact measurements, check the bottom of the article where you can find everything listed for easy printing. Happy cooking!
How to Make Ghost OREO Ball Truffles a Must
Now that you have your ingredients ready, let’s dive into the fun part—making these Ghost OREO Ball Truffles! Follow these simple steps, and you’ll have a spooky treat that’s sure to delight everyone.
Step 1: Crush the OREO Cookies
Start by placing your OREO cookies in a food processor. Pulse them until they turn into fine crumbs. You want a texture that resembles sand, which will help bind everything together. If you don’t have a food processor, you can also place the cookies in a zip-top bag and crush them with a rolling pin. Just make sure they’re finely crushed for the best results!
Step 2: Mix with Cream Cheese
In a mixing bowl, combine the crushed OREO cookies with the softened cream cheese. Use a spatula or your hands to mix until everything is well blended. The mixture should be thick and sticky, making it easy to form into balls. This creamy filling is what makes these truffles so delicious!
Step 3: Form the Balls
Now it’s time to roll the mixture into small balls. I like to use about a tablespoon of the mixture for each truffle. Place the rolled balls on a baking sheet lined with parchment paper. This will prevent them from sticking and make cleanup a breeze. Don’t worry if they’re not perfect; a little imperfection adds to their charm!
Step 4: Chill the Balls
Pop the baking sheet into the refrigerator for about 30 minutes. Chilling the balls is crucial as it helps them firm up, making them easier to dip later. Plus, it gives you a little break to clean up your workspace or enjoy a cup of coffee!
Step 5: Melt the White Chocolate
While the truffles chill, it’s time to melt the white chocolate melting wafers. Follow the package instructions for the best results. Usually, this involves microwaving them in short bursts, stirring in between until smooth. Be careful not to overheat, as burnt chocolate can ruin your coating!
Step 6: Dip the Truffles
Once the truffles are chilled, it’s time for the fun part—dipping! Using a fork, dip each chilled OREO ball into the melted white chocolate. Make sure they’re fully coated, then gently tap the fork on the edge of the bowl to remove excess chocolate. This will give you a nice, even coating.
Step 7: Let Them Set
After dipping, place the coated truffles back on the baking sheet. Allow them to set at room temperature or pop them back in the fridge for a quicker set. You’ll know they’re ready when the chocolate hardens and has a nice glossy finish.
Step 8: Decorate with Icing
Finally, it’s time to bring your ghostly creations to life! Use black icing to draw cute ghost faces on each truffle. You can get creative here—make them spooky or silly, whatever fits your style! This is the perfect way to add a personal touch to your treats.
Tips for Success
- Use room temperature cream cheese for easier mixing.
- Chill the truffles longer if they’re too soft to dip.
- For a smoother chocolate coating, add a teaspoon of vegetable oil to the melted chocolate.
- Experiment with different decorations, like sprinkles or edible glitter!
- Make a double batch; these truffles disappear quickly!
Equipment Needed
- Food processor: Essential for crushing OREO cookies. A zip-top bag and rolling pin work too!
- Mixing bowl: Any large bowl will do for combining ingredients.
- Baking sheet: Use a standard baking sheet lined with parchment paper for easy cleanup.
- Fork: Perfect for dipping the truffles into chocolate.
- Microwave-safe bowl: Needed for melting the white chocolate.
Variations
- Nutty Twist: Add crushed nuts like almonds or walnuts to the OREO mixture for a delightful crunch.
- Minty Fresh: Use mint-flavored OREO cookies for a refreshing twist on the classic flavor.
- Gluten-Free Option: Substitute regular OREO cookies with gluten-free OREO cookies to accommodate dietary needs.
- Vegan Version: Use vegan cream cheese and dairy-free chocolate for a plant-based treat everyone can enjoy.
- Flavor Infusion: Mix in a teaspoon of vanilla extract or almond extract for an extra layer of flavor.
Serving Suggestions
- Pair these Ghost OREO Ball Truffles with a spooky punch or hot apple cider for a festive drink.
- Serve them on a decorative platter with Halloween-themed decorations for an eye-catching presentation.
- For a fun twist, place them in cupcake liners for easy serving and a pop of color.
- Include a variety of Halloween treats alongside for a delightful dessert table.
FAQs about Ghost OREO Ball Truffles a Must
Can I make Ghost OREO Ball Truffles ahead of time?
Absolutely! These truffles can be made a day or two in advance. Just store them in an airtight container in the refrigerator. They’ll stay fresh and delicious, ready for your Halloween festivities!
How do I store leftover truffles?
To keep your Ghost OREO Ball Truffles at their best, store them in an airtight container in the fridge. They’ll last up to a week, but trust me, they’ll likely disappear long before then!
Can I freeze these truffles?
Yes, you can freeze them! Just place the truffles in a single layer on a baking sheet until frozen, then transfer them to an airtight container. They can be frozen for up to three months. Just thaw them in the fridge before serving.
What can I use instead of black icing for decoration?
If you don’t have black icing, you can use melted dark chocolate or even edible markers to draw ghost faces. Get creative with your decorations—there are no rules in the kitchen!
Are there any dietary alternatives for this recipe?
Definitely! You can make these truffles gluten-free by using gluten-free OREO cookies. For a vegan version, swap in vegan cream cheese and dairy-free chocolate. Everyone deserves a taste of these spooky delights!
Final Thoughts
Making Ghost OREO Ball Truffles is more than just a recipe; it’s a delightful experience that brings joy to your kitchen. The laughter shared while decorating these spooky treats with your kids is priceless. Each bite is a sweet reminder of the fun times spent together. Plus, they’re a hit at any Halloween gathering, leaving everyone wanting more. So, whether you’re a seasoned cook or a kitchen newbie, these truffles are a must-try. Embrace the spirit of the season and create delicious memories that will last long after the last truffle is gone!
Print
Ghost OREO Ball Truffles: Discover Irresistible Delights!
- Prep Time: 20 minutes
- Cook Time: 10 minutes
- Total Time: 1 hour
- Yield: 36 truffles 1x
- Category: Dessert
- Method: No-Bake
- Cuisine: American
- Diet: Vegetarian
Description
Ghost OREO Ball Truffles are delightful treats that combine the classic taste of OREO cookies with a spooky twist, perfect for Halloween celebrations.
Ingredients
- 1 package of OREO cookies (about 36 cookies)
- 8 oz cream cheese, softened
- 1 package of white chocolate melting wafers
- Black icing for decoration
Instructions
- Crush the OREO cookies into fine crumbs using a food processor.
- In a mixing bowl, combine the crushed OREO cookies with softened cream cheese until well blended.
- Roll the mixture into small balls and place them on a baking sheet lined with parchment paper.
- Chill the balls in the refrigerator for about 30 minutes to firm up.
- Melt the white chocolate melting wafers according to package instructions.
- Dip each chilled OREO ball into the melted white chocolate, ensuring they are fully coated.
- Place the coated truffles back on the baking sheet and let them set.
- Once set, use black icing to draw ghost faces on each truffle.
Notes
- For a more intense flavor, use double-stuffed OREO cookies.
- Store the truffles in an airtight container in the refrigerator for up to a week.
- These truffles can be made ahead of time and frozen for later use.
Nutrition
- Serving Size: 1 truffle
- Calories: 120
- Sugar: 10g
- Sodium: 50mg
- Fat: 7g
- Saturated Fat: 4g
- Unsaturated Fat: 2g
- Trans Fat: 0g
- Carbohydrates: 14g
- Fiber: 0g
- Protein: 1g
- Cholesterol: 10mg


