Introduction to Christmas Cherry Mash Truffles
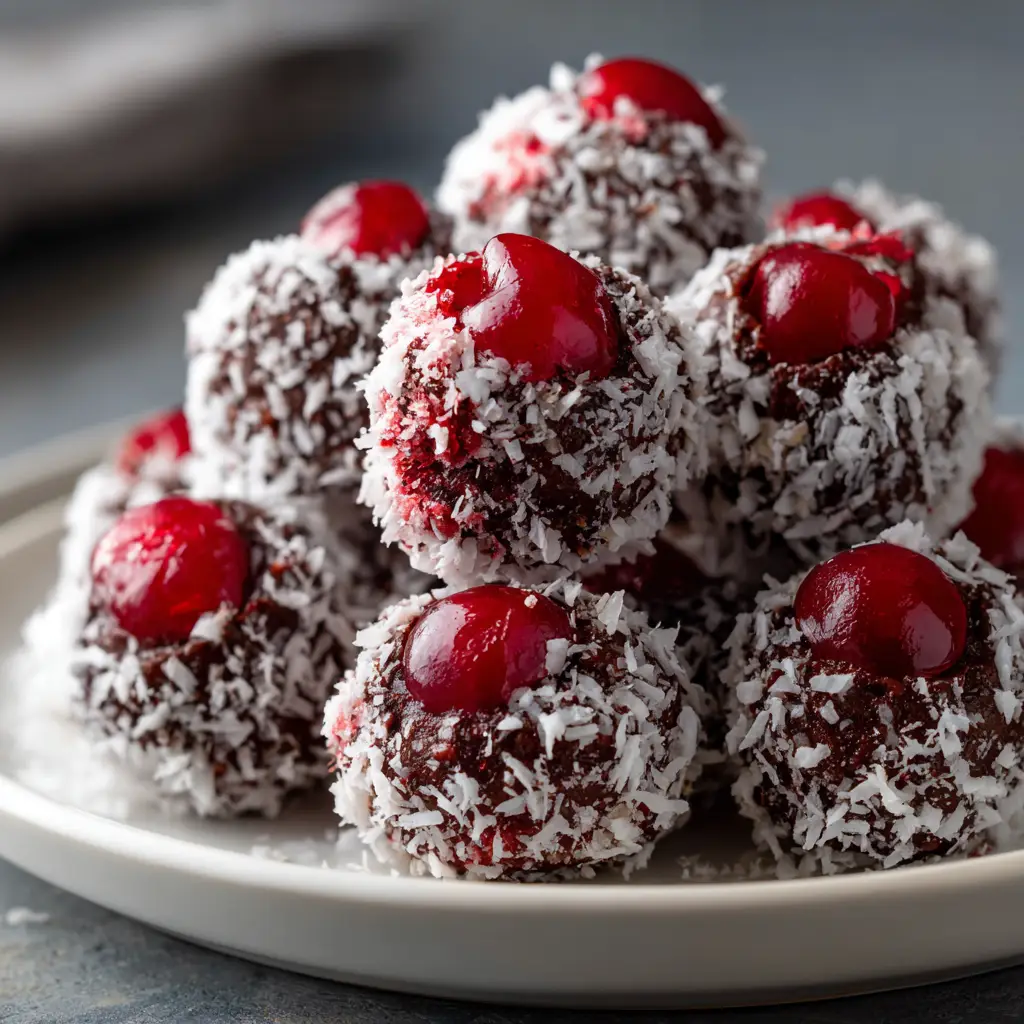
As the holiday season approaches, I find myself dreaming of sweet treats that bring joy to my family. That’s where my Christmas Cherry Mash Truffles come in! These delightful little bites are not just a dessert; they’re a celebration of flavors that capture the essence of Christmas. Perfect for busy moms like us, this no-bake recipe is quick and easy, making it a fantastic solution for those last-minute gatherings. Plus, they’re sure to impress your loved ones, leaving them asking for more. Let’s dive into this festive adventure together!
Why You’ll Love This Christmas Cherry Mash Truffles
These Christmas Cherry Mash Truffles are a holiday miracle wrapped in chocolate! They’re incredibly easy to whip up, taking just 30 minutes from start to finish. With a delightful blend of cherry and chocolate, each bite is a burst of festive flavor. Plus, they require no baking, making them perfect for busy days when time is tight. Trust me, these truffles will become a cherished tradition in your home!
Ingredients for Christmas Cherry Mash Truffles
Gathering the right ingredients is the first step to creating these delightful Christmas Cherry Mash Truffles. Here’s what you’ll need:
- Maraschino cherries: These sweet, vibrant cherries add a pop of color and a burst of flavor. Make sure to drain them well to avoid excess moisture.
- Powdered sugar: This fine sugar gives the truffles their sweetness and helps bind the mixture together. It’s a must for that melt-in-your-mouth texture!
- Crushed graham crackers: These provide a delightful crunch and a hint of honey flavor. You can substitute with crushed vanilla wafers for a different twist.
- Creamy peanut butter: This ingredient adds richness and a nutty flavor that complements the cherries beautifully. If you’re looking for a nut-free option, try sunflower seed butter.
- Semi-sweet chocolate chips: The star of the show! These will coat your truffles in a luscious chocolate layer. Dark chocolate can be used for a richer taste.
- Coconut oil: This helps the chocolate melt smoothly and gives a nice sheen to the finished truffles. You can use vegetable oil as a substitute if needed.
For those who want to get creative, consider adding a sprinkle of crushed nuts or festive holiday sprinkles on top of the chocolate before it sets. The exact quantities for each ingredient are listed at the bottom of the article for your convenience, ready for printing!
How to Make Christmas Cherry Mash Truffles
Step 1: Prepare the Cherry Mixture
Let’s kick things off by creating the cherry mixture! In a mixing bowl, combine the drained maraschino cherries, powdered sugar, crushed graham crackers, and creamy peanut butter. I like to use a sturdy spatula to mix everything together until it’s well combined. The cherries should be evenly distributed, and the mixture should hold together nicely. This step is where the magic begins, as the sweet and nutty flavors meld into a delightful base for our truffles!
Step 2: Form the Truffles
Now it’s time to shape our cherry mixture into truffles! With clean hands, take small portions of the mixture and roll them into balls, about the size of a tablespoon. Place each ball on a baking sheet lined with parchment paper. This makes for easy cleanup later! Don’t worry if they aren’t perfectly round; the charm of homemade treats lies in their uniqueness. Plus, they’ll be covered in chocolate, so no one will notice!
Step 3: Chill the Truffles
To help the truffles firm up, pop the baking sheet into the refrigerator for about 30 minutes. This chilling time is crucial, as it allows the flavors to meld and makes them easier to coat in chocolate later. While you wait, you can sip on some hot cocoa or catch up on your favorite holiday movie. It’s a win-win!
Step 4: Melt the Chocolate
Once the truffles are chilled, it’s time to melt the chocolate! In a microwave-safe bowl, combine the semi-sweet chocolate chips and coconut oil. Heat them in the microwave in 30-second intervals, stirring in between until the mixture is smooth and glossy. The coconut oil not only helps the chocolate melt evenly but also gives it a beautiful sheen. Just be careful not to overheat it, or you’ll end up with a clumpy mess!
Step 5: Coat the Truffles
Now comes the fun part—coating the truffles! Using a fork or a toothpick, dip each chilled ball into the melted chocolate, ensuring they are fully coated. Let any excess chocolate drip off before placing them back on the parchment-lined baking sheet. If you want to add a festive touch, sprinkle crushed nuts or holiday sprinkles on top while the chocolate is still wet. It’s a simple way to make them look extra special!
Step 6: Set the Truffles
Finally, let the chocolate-covered truffles set! You can either leave them at room temperature or pop them back in the refrigerator until the chocolate hardens. This usually takes about 15-20 minutes. Once set, they’re ready to be enjoyed! Just remember to store any leftovers in an airtight container in the fridge. Trust me, they won’t last long!
Tips for Success
- Make sure to drain the maraschino cherries well to avoid a soggy mixture.
- Use a cookie scoop for evenly sized truffles; it makes rolling easier!
- Chill the truffles long enough to firm up; this helps with coating.
- Experiment with different chocolate types for unique flavors.
- Don’t skip the sprinkles; they add a festive touch!
Equipment Needed
- Mixing bowl: A large bowl for combining ingredients. A sturdy spatula works wonders here.
- Baking sheet: Use a standard baking sheet lined with parchment paper. A plate can work in a pinch!
- Microwave-safe bowl: For melting chocolate. A glass bowl is perfect for this task.
- Fork or toothpick: Essential for dipping the truffles into chocolate. A skewer can also do the trick!
Variations
- Nut-Free Option: Substitute creamy peanut butter with sunflower seed butter for a nut-free delight.
- Dark Chocolate Lovers: Use dark chocolate chips instead of semi-sweet for a richer flavor.
- Minty Twist: Add a few drops of peppermint extract to the cherry mixture for a refreshing holiday flavor.
- Fruit Fusion: Mix in some finely chopped dried cranberries or raisins for added texture and flavor.
- Vegan Version: Use dairy-free chocolate chips and maple syrup instead of powdered sugar for a vegan-friendly treat.
Serving Suggestions
- Pair these truffles with a warm cup of hot cocoa or spiced apple cider for a cozy treat.
- Serve on a festive platter, garnished with fresh mint leaves or edible flowers for a pop of color.
- Wrap individual truffles in colorful foil for a delightful gift or party favor.
- For a fun twist, serve alongside a scoop of vanilla ice cream for an indulgent dessert.
FAQs about Christmas Cherry Mash Truffles
Can I make Christmas Cherry Mash Truffles ahead of time?
Absolutely! These truffles can be made a few days in advance. Just store them in an airtight container in the refrigerator. They’ll stay fresh and delicious, making them perfect for holiday gatherings!
What can I use instead of maraschino cherries?
If you’re not a fan of maraschino cherries, you can substitute them with dried cherries or even fresh cherries. Just keep in mind that the texture and sweetness will vary, so adjust the sugar accordingly.
How do I store leftover truffles?
To keep your Christmas Cherry Mash Truffles fresh, store them in an airtight container in the refrigerator. They should last for up to two weeks, but I doubt they’ll last that long!
Can I freeze these truffles?
Yes, you can freeze them! Just place the truffles in a single layer on a baking sheet until frozen, then transfer them to a freezer-safe container. They’ll keep for about a month. Just thaw them in the fridge before serving.
What’s the best way to serve these truffles?
For a festive touch, serve your Christmas Cherry Mash Truffles on a decorative platter, garnished with fresh mint or holiday sprinkles. They make a delightful addition to any holiday dessert table!
Final Thoughts
Creating these Christmas Cherry Mash Truffles is more than just making a dessert; it’s about crafting sweet memories with loved ones. The joy of rolling the truffles, dipping them in chocolate, and adding festive sprinkles brings a sense of togetherness that’s perfect for the holiday season. Each bite is a delightful reminder of the warmth and love that fills our homes during this time. So, gather your family, share the laughter, and indulge in these delightful treats. Trust me, they’ll become a cherished part of your holiday traditions, bringing smiles and sweet moments for years to come!
Print
Christmas Cherry Mash Truffles: Indulge in Joyful Delights!
- Prep Time: 20 minutes
- Cook Time: 10 minutes
- Total Time: 30 minutes
- Yield: 24 truffles 1x
- Category: Dessert
- Method: No-bake
- Cuisine: American
- Diet: Vegetarian
Description
Delicious and festive truffles made with cherry and chocolate, perfect for Christmas celebrations.
Ingredients
- 1 cup maraschino cherries, drained
- 1 cup powdered sugar
- 1 cup crushed graham crackers
- 1/2 cup creamy peanut butter
- 1 cup semi-sweet chocolate chips
- 1 tablespoon coconut oil
Instructions
- In a mixing bowl, combine the maraschino cherries, powdered sugar, crushed graham crackers, and peanut butter until well mixed.
- Form the mixture into small balls and place them on a baking sheet lined with parchment paper.
- Chill the balls in the refrigerator for about 30 minutes.
- In a microwave-safe bowl, melt the chocolate chips and coconut oil together until smooth.
- Dip each chilled ball into the melted chocolate, ensuring they are fully coated.
- Return the chocolate-covered truffles to the baking sheet and let them set at room temperature or refrigerate until the chocolate hardens.
Notes
- For a festive touch, sprinkle crushed nuts or holiday sprinkles on top of the chocolate before it sets.
- Store the truffles in an airtight container in the refrigerator for up to two weeks.
Nutrition
- Serving Size: 1 truffle
- Calories: 120
- Sugar: 10g
- Sodium: 50mg
- Fat: 7g
- Saturated Fat: 2g
- Unsaturated Fat: 5g
- Trans Fat: 0g
- Carbohydrates: 15g
- Fiber: 1g
- Protein: 2g
- Cholesterol: 0mg


