
Introduction to Christmas Cherry Fudge
As the holiday season approaches, I find myself dreaming of sweet treats that bring joy to my family. One of my absolute favorites is Christmas Cherry Fudge. This delightful confection combines rich chocolate with the sweetness of cherries, creating a festive treat that’s perfect for sharing.
Whether you’re a busy mom juggling holiday plans or a professional looking to impress loved ones, this recipe is a quick solution. In just a few simple steps, you can whip up a batch of this delicious fudge that will have everyone asking for seconds!
Why You’ll Love This Christmas Cherry Fudge
This Christmas Cherry Fudge is a true lifesaver during the busy holiday season. It’s incredibly easy to make, requiring just a few ingredients and minimal time. In about 25 minutes, you can create a rich, chocolatey treat that’s bursting with flavor. Plus, the combination of sweet cherries and creamy fudge is simply irresistible. It’s a delightful way to spread holiday cheer without spending hours in the kitchen!
Ingredients for Christmas Cherry Fudge
Gathering the right ingredients is the first step to creating your Christmas Cherry Fudge. Here’s what you’ll need:
- Chocolate chips: The star of the show! Use semi-sweet or dark chocolate chips for a rich flavor.
- Sweetened condensed milk: This creamy ingredient adds sweetness and helps bind everything together, making the fudge smooth and luscious.
- Chopped cherries: Fresh or jarred, these add a burst of fruity sweetness. Dried cherries work too if you prefer a chewier texture.
- Vanilla extract: A splash of this aromatic extract enhances the overall flavor, making the fudge even more delightful.
- Chopped nuts (optional): Walnuts or pecans can add a lovely crunch. If you’re nut-free, feel free to skip this ingredient!
For those who want to get creative, you can substitute cherries with other dried fruits like cranberries or apricots.
All the exact measurements are at the bottom of the article, ready for you to print out and take to the kitchen!
How to Make Christmas Cherry Fudge
Step 1: Melt the Chocolate
To start your Christmas Cherry Fudge, grab a saucepan and combine the chocolate chips with sweetened condensed milk. Set the heat to low and stir continuously. This is where the magic happens! As the chocolate melts, it will blend beautifully with the milk, creating a smooth and creamy mixture. Keep stirring until everything is well combined and there are no lumps. The aroma of melting chocolate will fill your kitchen, making it hard to resist sneaking a taste!
Step 2: Add Flavor and Cherries
Once your chocolate is melted and smooth, it’s time to add some flavor! Remove the saucepan from the heat and stir in the vanilla extract. This little addition elevates the fudge to a whole new level. Next, fold in the chopped cherries. Their sweetness and vibrant color will make your fudge not only delicious but also festive. Make sure the cherries are evenly distributed throughout the mixture for that perfect bite!
Step 3: Incorporate Nuts
If you love a bit of crunch, now’s the time to fold in some chopped nuts. Walnuts or pecans work wonderfully here. They add texture and a nutty flavor that complements the chocolate and cherries. If nuts aren’t your thing, feel free to skip this step. The fudge will still be delightful!
Step 4: Set the Fudge
Now that your mixture is ready, it’s time to pour it into a greased 8×8 inch pan. Use a spatula to spread it evenly, ensuring every corner is filled. Once it’s all in the pan, pop it into the refrigerator. Let it chill for at least two hours, or until it’s set. This is the hardest part—waiting! But trust me, the end result will be worth it.
Step 5: Cut and Serve
After the fudge has set, take it out of the fridge and cut it into squares. I like to use a sharp knife for clean edges. Serve these delightful treats on a festive platter, and watch your family and friends light up with joy. They’ll be asking for your Christmas Cherry Fudge recipe in no time!
Tips for Success
- Make sure to stir continuously while melting the chocolate to prevent it from burning.
- For a smoother fudge, use high-quality chocolate chips.
- Let the fudge cool slightly before adding cherries to maintain their texture.
- Use parchment paper in the pan for easy removal of the fudge.
- Store any leftovers in an airtight container in the fridge to keep them fresh.
Equipment Needed
- Medium saucepan: A non-stick option works best for easy cleanup.
- Spatula: Use a silicone spatula for stirring and spreading the fudge.
- 8×8 inch pan: If you don’t have one, a similar-sized dish will do.
- Sharp knife: Essential for cutting the fudge into neat squares.
Variations of Christmas Cherry Fudge
- Nut-Free Version: Omit the nuts for a smooth, creamy fudge that’s perfect for those with nut allergies.
- Dark Chocolate Delight: Swap semi-sweet chocolate chips for dark chocolate chips for a richer flavor.
- Cherry Almond Fudge: Add a teaspoon of almond extract instead of vanilla for a delightful twist.
- Minty Fresh Fudge: Incorporate a few drops of peppermint extract for a festive minty flavor.
- Fruit Medley Fudge: Mix in a variety of dried fruits like cranberries, apricots, or raisins for a colorful and flavorful treat.
Serving Suggestions for Christmas Cherry Fudge
- Festive Platter: Arrange the fudge squares on a colorful holiday platter for a beautiful presentation.
- Pair with Coffee: Serve alongside a warm cup of coffee or hot cocoa for a cozy treat.
- Garnish with Mint: Add fresh mint leaves on top for a pop of color and freshness.
- Gift Packaging: Wrap fudge squares in cellophane and tie with a ribbon for delightful homemade gifts.
FAQs about Christmas Cherry Fudge
Can I use frozen cherries instead of fresh?
Absolutely! Frozen cherries work just as well. Just make sure to thaw and drain them before adding to the fudge. This will prevent excess moisture from affecting the texture.
How long does Christmas Cherry Fudge last?
When stored in an airtight container in the refrigerator, your Christmas Cherry Fudge can last up to two weeks. It’s a great make-ahead treat for holiday gatherings!
Can I make this fudge dairy-free?
Yes! You can use dairy-free chocolate chips and coconut milk instead of sweetened condensed milk. This way, everyone can enjoy the festive flavors of Christmas Cherry Fudge!
What’s the best way to cut the fudge?
For clean cuts, use a sharp knife and warm it slightly under hot water. Wipe it dry before cutting. This will help you achieve those perfect squares without crumbling.
Can I freeze Christmas Cherry Fudge?
Yes, you can freeze it! Just wrap the fudge tightly in plastic wrap and then in aluminum foil. It can last up to three months in the freezer. Thaw it in the fridge before serving.
Final Thoughts
Making Christmas Cherry Fudge is more than just a recipe; it’s a delightful experience that brings warmth and joy to the holiday season. The rich chocolate combined with sweet cherries creates a treat that’s perfect for sharing with family and friends.
As you gather around the table, watching loved ones savor each bite, you’ll feel the spirit of the holidays come alive. This fudge is not just a dessert; it’s a sweet memory in the making. So, roll up your sleeves, embrace the festive spirit, and let this Christmas Cherry Fudge be a part of your holiday traditions!
Print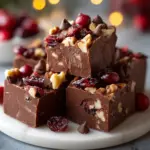
Christmas Cherry Fudge: Delight in this Festive Treat!
- Prep Time: 15 minutes
- Cook Time: 10 minutes
- Total Time: 2 hours 25 minutes
- Yield: 16 squares 1x
- Category: Dessert
- Method: Stovetop and Refrigeration
- Cuisine: American
- Diet: Vegetarian
Description
A delightful and festive treat perfect for Christmas, combining rich chocolate and sweet cherries.
Ingredients
- 2 cups of chocolate chips
- 1 cup of sweetened condensed milk
- 1 cup of chopped cherries
- 1 teaspoon of vanilla extract
- 1/2 cup of chopped nuts (optional)
Instructions
- In a saucepan, combine chocolate chips and sweetened condensed milk over low heat.
- Stir continuously until the chocolate is melted and smooth.
- Remove from heat and stir in vanilla extract and chopped cherries.
- If desired, fold in chopped nuts.
- Pour the mixture into a greased 8×8 inch pan and spread evenly.
- Refrigerate for at least 2 hours or until set.
- Cut into squares and serve.
Notes
- Store in an airtight container in the refrigerator.
- Can be made ahead of time for holiday gatherings.
- Feel free to substitute cherries with other dried fruits if desired.
Nutrition
- Serving Size: 1 square
- Calories: 150
- Sugar: 12g
- Sodium: 30mg
- Fat: 8g
- Saturated Fat: 5g
- Unsaturated Fat: 3g
- Trans Fat: 0g
- Carbohydrates: 18g
- Fiber: 1g
- Protein: 2g
- Cholesterol: 5mg


