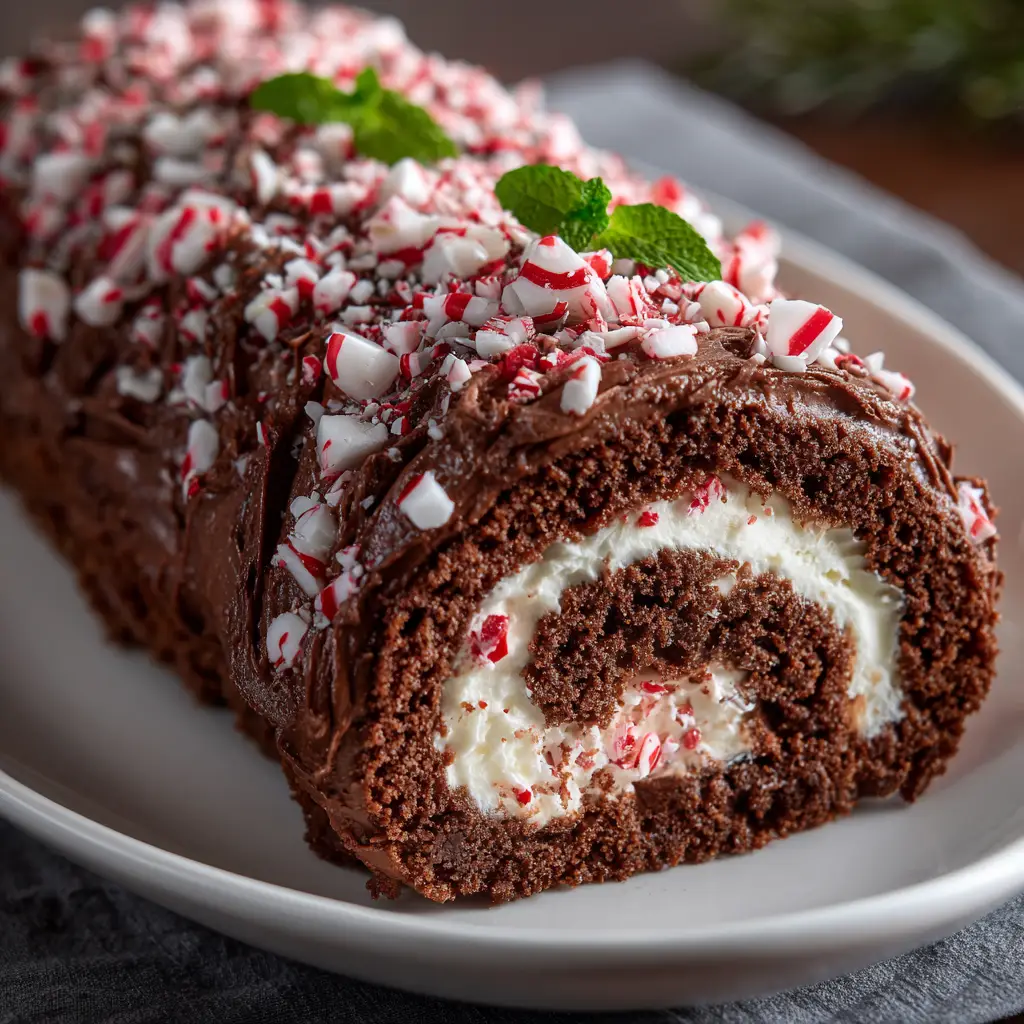
Introduction to Chocolate Peppermint Bark Roll Cake
As the holiday season approaches, I find myself craving something sweet yet festive. That’s where my chocolate peppermint bark roll cake comes into play! This delightful dessert is not only a feast for the eyes but also a treat for the taste buds. It’s perfect for busy moms like us who want to impress family and friends without spending hours in the kitchen. With its rich chocolate flavor and refreshing peppermint twist, this roll cake is sure to become a cherished holiday tradition in your home. Let’s dive into this delicious adventure together!
Why You’ll Love This Chocolate Peppermint Bark Roll Cake
This chocolate peppermint bark roll cake is a game-changer for your holiday baking! It’s quick to whip up, taking just about an hour and a half from start to finish. The combination of rich chocolate and refreshing peppermint creates a flavor explosion that will have everyone asking for seconds. Plus, it’s a stunning centerpiece for any gathering, making you look like a culinary superstar without the stress!
Ingredients for Chocolate Peppermint Bark Roll Cake
Gathering the right ingredients is the first step to creating your chocolate peppermint bark roll cake. Here’s what you’ll need:
- All-purpose flour: This is the base of your cake, providing structure and stability.
- Unsweetened cocoa powder: It adds that rich chocolate flavor we all love.
- Baking powder: This helps the cake rise, giving it a light and fluffy texture.
- Salt: Just a pinch enhances the sweetness and balances flavors.
- Large eggs: They bind the ingredients together and contribute to the cake’s moisture.
- Granulated sugar: Sweetens the cake and helps create a tender crumb.
- Vanilla extract: A classic flavor enhancer that adds warmth to the cake.
- Peppermint extract: This is where the magic happens! It gives that refreshing holiday twist.
- Heavy cream: Used for the filling, it whips up beautifully for a creamy texture.
- Powdered sugar: Sweetens the filling and helps stabilize the whipped cream.
- Crushed peppermint candies: These add a delightful crunch and extra peppermint flavor.
- Semisweet chocolate: Melted and drizzled on top, it adds a rich finish to your cake.
For those looking to customize, consider using gluten-free flour or dairy-free alternatives for the cream. You can find all the exact measurements at the bottom of the article, ready for printing!
How to Make Chocolate Peppermint Bark Roll Cake
Now that we have our ingredients ready, let’s get to the fun part—making the chocolate peppermint bark roll cake! Follow these simple steps, and you’ll have a stunning dessert that will wow your family and friends.
Step 1: Preheat and Prepare
First things first, preheat your oven to 350°F (175°C). This ensures your cake bakes evenly. While the oven warms up, line a baking sheet with parchment paper. This will help the cake release easily after baking, making your life a whole lot easier!
Step 2: Mix Dry Ingredients
In a medium bowl, whisk together the all-purpose flour, unsweetened cocoa powder, baking powder, and salt. This step is crucial as it combines the dry ingredients and helps to aerate the flour. A well-mixed dry blend leads to a lighter cake!
Step 3: Beat Eggs and Sugar
In a separate large bowl, beat the eggs and granulated sugar together until the mixture is light and fluffy. This usually takes about 3-5 minutes. You want it to look pale and creamy. This step adds air to the batter, which is key for a soft roll cake.
Step 4: Combine Wet Ingredients
Next, mix in the vanilla and peppermint extracts. The aroma will be heavenly! These extracts are what give your cake that festive flavor. Just a little goes a long way in making your cake taste like the holidays.
Step 5: Combine Mixtures
Now, gradually add the dry ingredients to the egg mixture. Use a spatula to fold them together gently. Be careful not to overmix; you want to keep that airy texture. Just mix until you see no more flour streaks, and you’re good to go!
Step 6: Spread and Bake
Spread the batter evenly onto the prepared baking sheet. Use a spatula to smooth it out. Bake in the preheated oven for 12-15 minutes. Keep an eye on it! A toothpick inserted in the center should come out clean when it’s done.
Step 7: Cool and Roll
Once baked, remove the cake from the oven and let it cool for about 5 minutes. While it’s still warm, carefully roll it up with the parchment paper. This helps shape the cake for later. Don’t worry if it cracks a little; it’s all part of the process!
Step 8: Prepare the Filling
While the cake cools, whip the heavy cream and powdered sugar together until stiff peaks form. This means it should hold its shape when you lift the whisk. Gently fold in the crushed peppermint candies for that delightful crunch and flavor.
Step 9: Assemble the Cake
Unroll the cooled cake carefully. Spread the peppermint filling evenly over the surface. Then, re-roll the cake gently, using the parchment paper to help you. This is where the magic happens, transforming your cake into a beautiful roll!
Step 10: Drizzle and Chill
Finally, drizzle the melted semisweet chocolate over the top of the rolled cake. Sprinkle with additional crushed peppermint candies for that festive touch. Chill the cake in the refrigerator for at least an hour before serving. This helps the flavors meld together beautifully!
Tips for Success
- Roll the cake while it’s still warm to prevent cracking.
- Use a clean kitchen towel dusted with powdered sugar to help with rolling.
- For a stronger peppermint flavor, increase the peppermint extract slightly.
- Chill the cake for at least an hour to set the filling properly.
- Store leftovers in an airtight container in the refrigerator for freshness.
Equipment Needed
- Baking sheet: A standard half-sheet pan works well; a jelly roll pan is a great alternative.
- Parchment paper: Use wax paper if you’re in a pinch, but parchment is best for easy release.
- Mixing bowls: A set of various sizes will help with mixing ingredients.
- Whisk: A hand whisk or electric mixer will do the job.
- Spatula: A rubber spatula is perfect for folding and spreading.
Variations
- Gluten-Free: Substitute all-purpose flour with a gluten-free blend to make this cake suitable for those with gluten sensitivities.
- Dairy-Free: Use coconut cream or almond milk whipped cream in place of heavy cream for a dairy-free option.
- Mint Chocolate Chip: Add mini chocolate chips to the filling for an extra chocolatey surprise!
- Chocolate Ganache: Instead of drizzling melted chocolate, pour a rich chocolate ganache over the cake for a decadent finish.
- Nutty Twist: Fold in finely chopped nuts, like walnuts or pecans, into the filling for added texture and flavor.
Serving Suggestions
- Pair your chocolate peppermint bark roll cake with a scoop of vanilla ice cream for a delightful contrast.
- Serve with a warm cup of peppermint tea or hot cocoa to enhance the festive flavors.
- Garnish with fresh mint leaves for a pop of color and freshness.
- Dust with powdered sugar before serving for an elegant touch.
FAQs about Chocolate Peppermint Bark Roll Cake
Can I make this chocolate peppermint bark roll cake ahead of time?
Absolutely! You can prepare the cake a day in advance. Just keep it wrapped in the refrigerator. The flavors will meld beautifully overnight, making it even more delicious!
What can I use instead of peppermint extract?
If you don’t have peppermint extract, you can use mint extract as a substitute. Just be cautious, as mint extract can be stronger. Start with a smaller amount and adjust to taste.
How do I store leftovers of the chocolate peppermint bark roll cake?
Store any leftovers in an airtight container in the refrigerator. It should stay fresh for up to three days. Just remember to let it come to room temperature before serving for the best flavor!
Can I freeze the chocolate peppermint bark roll cake?
Yes, you can freeze the roll cake! Wrap it tightly in plastic wrap and then in aluminum foil. It can be frozen for up to a month. Thaw it in the refrigerator before serving.
What can I serve with the chocolate peppermint bark roll cake?
This cake pairs wonderfully with a dollop of whipped cream or a scoop of vanilla ice cream. A warm cup of coffee or hot cocoa also complements the flavors perfectly!
Final Thoughts
Creating this chocolate peppermint bark roll cake is more than just baking; it’s about sharing joy and warmth with loved ones. The delightful combination of rich chocolate and refreshing peppermint brings a festive spirit to any gathering. I love how this cake not only looks stunning but also tastes incredible, making it a perfect centerpiece for holiday celebrations. Whether you’re a busy mom or a professional, this recipe is a quick and rewarding way to spread cheer. So, roll up your sleeves and let the magic of this cake fill your home with sweet memories!
Print
Chocolate peppermint bark roll cake will delight your taste buds!
- Prep Time: 30 minutes
- Cook Time: 15 minutes
- Total Time: 1 hour 45 minutes
- Yield: 8 servings 1x
- Category: Dessert
- Method: Baking
- Cuisine: American
- Diet: Vegetarian
Description
A delicious and festive chocolate peppermint bark roll cake that combines rich chocolate flavor with refreshing peppermint.
Ingredients
- 1 cup all-purpose flour
- 1/2 cup unsweetened cocoa powder
- 1 teaspoon baking powder
- 1/2 teaspoon salt
- 4 large eggs
- 1 cup granulated sugar
- 1 teaspoon vanilla extract
- 1/2 teaspoon peppermint extract
- 1 cup heavy cream
- 1/2 cup powdered sugar
- 1/2 cup crushed peppermint candies
- 4 ounces semisweet chocolate, melted
Instructions
- Preheat the oven to 350°F (175°C) and line a baking sheet with parchment paper.
- In a bowl, whisk together flour, cocoa powder, baking powder, and salt.
- In another bowl, beat eggs and granulated sugar until light and fluffy.
- Mix in vanilla and peppermint extracts.
- Gradually add the dry ingredients to the egg mixture, mixing until just combined.
- Spread the batter evenly onto the prepared baking sheet.
- Bake for 12-15 minutes or until a toothpick comes out clean.
- Once baked, remove from the oven and let it cool slightly before rolling it up with the parchment paper.
- For the filling, whip heavy cream and powdered sugar until stiff peaks form, then fold in crushed peppermint candies.
- Unroll the cake, spread the filling evenly, and re-roll the cake carefully.
- Drizzle melted chocolate over the top and sprinkle with additional crushed peppermint candies.
- Chill in the refrigerator for at least 1 hour before serving.
Notes
- Make sure to roll the cake while it is still warm to prevent cracking.
- Store leftovers in an airtight container in the refrigerator.
- For a stronger peppermint flavor, increase the amount of peppermint extract.
Nutrition
- Serving Size: 1 slice
- Calories: 250
- Sugar: 20g
- Sodium: 150mg
- Fat: 12g
- Saturated Fat: 7g
- Unsaturated Fat: 3g
- Trans Fat: 0g
- Carbohydrates: 30g
- Fiber: 2g
- Protein: 4g
- Cholesterol: 80mg


