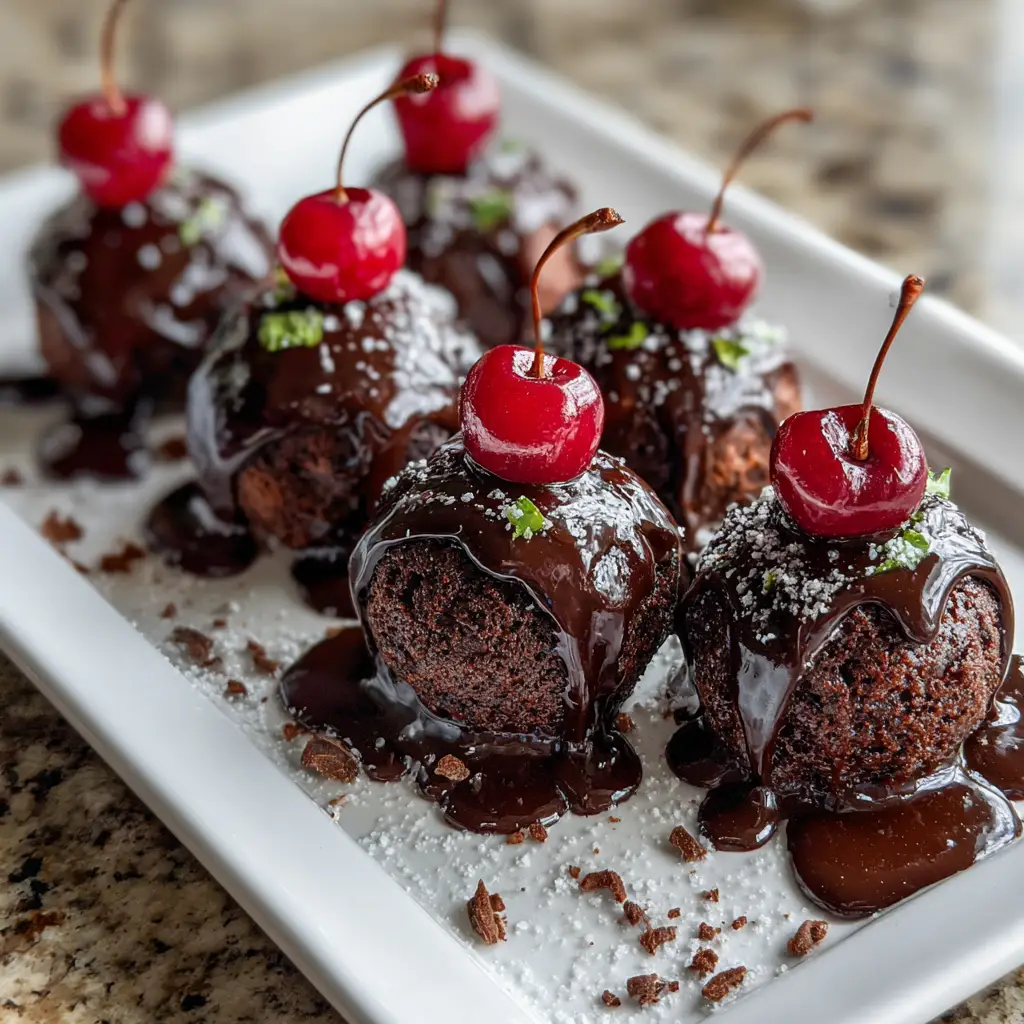
Introduction to Chocolate Covered Cherry Brownie Bombs
Hey there, fellow dessert lovers! If you’re anything like me, you know that life can get pretty hectic. Between juggling work, family, and everything in between, finding time to whip up something special can feel impossible. That’s where these delightful Chocolate Covered Cherry Brownie Bombs come in! They’re the perfect quick solution for a busy day or a sweet treat to impress your loved ones. With rich brownie bites and a luscious cherry filling, these little gems are sure to bring smiles all around. Let’s dive into this delicious adventure together!
Why You’ll Love This Chocolate Covered Cherry Brownie Bombs
These Chocolate Covered Cherry Brownie Bombs are a dream come true for busy moms and professionals alike. They’re incredibly easy to make, taking just about 50 minutes from start to finish. The combination of rich chocolate and sweet cherry filling creates a flavor explosion that’s hard to resist. Plus, they’re perfect for sharing at gatherings or simply indulging after a long day. Trust me, you’ll want to keep this recipe close!
Ingredients for Chocolate Covered Cherry Brownie Bombs
Gathering the right ingredients is the first step to creating these delightful Chocolate Covered Cherry Brownie Bombs. Here’s what you’ll need:
- Brownie mix: The star of the show! A box mix saves time and ensures a rich, fudgy base.
- Cherry pie filling: This adds a burst of sweetness and a juicy surprise in every bite. You can use homemade if you’re feeling adventurous!
- Chocolate chips: Choose semi-sweet or dark chocolate for a decadent coating. Dark chocolate gives a richer flavor.
- Vegetable oil: This helps the chocolate melt smoothly, creating a glossy finish. You can substitute with coconut oil for a hint of tropical flavor.
- Vanilla extract: A splash of vanilla enhances the overall flavor, making everything taste even better.
- Powdered sugar: Optional for dusting! It adds a lovely touch of sweetness and a pretty presentation.
For exact measurements, check the bottom of the article where you can find everything listed for easy printing. Now, let’s get cooking!
How to Make Chocolate Covered Cherry Brownie Bombs
Now that we have our ingredients ready, let’s dive into the fun part—making these Chocolate Covered Cherry Brownie Bombs! Follow these simple steps, and you’ll have a batch of delicious treats in no time.
Step 1: Preheat the Oven
First things first, preheat your oven according to the brownie mix instructions. Preheating is crucial because it ensures even baking. If you skip this step, your brownies might end up unevenly cooked, and nobody wants that!
Step 2: Prepare the Brownie Mix
Next, grab your brownie mix and follow the box instructions. It’s as easy as adding water, eggs, and oil. For a little extra flavor, consider adding a splash of vanilla extract or a pinch of salt. This simple tweak can elevate your brownies to a whole new level!
Step 3: Layer the Brownie Batter
Now, pour half of the brownie batter into a greased baking dish. Spread it evenly, then drop spoonfuls of cherry pie filling over the batter. Don’t be shy—make sure to distribute it well! Finally, cover it with the remaining brownie batter, sealing in that cherry goodness.
Step 4: Bake the Brownies
Time to bake! Place your dish in the preheated oven and bake according to the package instructions. Keep an eye on them, though! To check for doneness, insert a toothpick into the center. If it comes out clean or with a few moist crumbs, they’re ready!
Step 5: Cool and Cut
Once baked, let the brownies cool completely in the pan. This step is essential for easy cutting. When they’re cool, use a sharp knife to cut them into bite-sized pieces. Trust me, these little squares will be hard to resist!
Step 6: Melt the Chocolate
While the brownies cool, it’s time to melt the chocolate. Combine the chocolate chips and vegetable oil in a microwave-safe bowl. Heat in short bursts, stirring in between, until smooth. This will give you that glossy coating we all love!
Step 7: Dip the Brownie Bombs
Now comes the fun part—dipping! Take each brownie piece and dip it into the melted chocolate, ensuring it’s fully coated. Use a fork to lift it out, letting any excess chocolate drip off. This will help you achieve a beautiful finish!
Step 8: Chill and Serve
Place the chocolate-covered brownie bombs on a parchment-lined tray and refrigerate until the chocolate hardens. This usually takes about 30 minutes. If you want to add a touch of sweetness, dust them with powdered sugar before serving. Enjoy your delicious creations!
Tips for Success
- Use a high-quality brownie mix for the best flavor and texture.
- Let the brownies cool completely before cutting to avoid crumbling.
- For a smoother chocolate coating, ensure the chocolate is fully melted and well-mixed with oil.
- Experiment with different chocolate types for unique flavors.
- Store leftovers in an airtight container to keep them fresh and delicious.
Equipment Needed
- Baking dish: A 9×13 inch dish works perfectly. You can also use a smaller dish for thicker brownies.
- Mixing bowl: Any large bowl will do for mixing the brownie batter.
- Microwave-safe bowl: For melting chocolate; a double boiler is a great alternative.
- Sharp knife: Essential for cutting the brownies into bite-sized pieces.
- Parchment paper: Use it to line your tray for easy cleanup.
Variations
- Nutty Delight: Add chopped walnuts or pecans to the brownie batter for a crunchy texture.
- Gluten-Free Option: Use a gluten-free brownie mix to make these treats suitable for gluten-sensitive friends.
- Fruit Fusion: Swap cherry pie filling for raspberry or strawberry for a different fruity twist.
- Minty Fresh: Incorporate a few drops of peppermint extract into the chocolate for a refreshing flavor.
- Vegan Version: Use a vegan brownie mix and substitute eggs with applesauce or flaxseed meal.
Serving Suggestions
- Pair with a scoop of vanilla ice cream for a delightful contrast.
- Serve alongside fresh berries for a pop of color and freshness.
- Drizzle with caramel sauce for an extra indulgent touch.
- Present on a decorative platter for a stunning dessert display.
- Enjoy with a cup of coffee or tea for a cozy treat.
FAQs about Chocolate Covered Cherry Brownie Bombs
Can I use homemade brownie mix for Chocolate Covered Cherry Brownie Bombs?
Absolutely! If you have a favorite homemade brownie recipe, feel free to use it. Just ensure it has a similar texture to a box mix for the best results.
How do I store leftover Chocolate Covered Cherry Brownie Bombs?
Store them in an airtight container in the refrigerator. They’ll stay fresh for up to a week, but I doubt they’ll last that long!
Can I freeze these brownie bombs?
Yes! These treats freeze beautifully. Just place them in a single layer in a freezer-safe container. They can be enjoyed later, making them perfect for meal prep!
What can I substitute for cherry pie filling?
If cherries aren’t your thing, try using other fruit fillings like raspberry or blueberry. You can even use chocolate ganache for a double chocolate experience!
Are Chocolate Covered Cherry Brownie Bombs suitable for kids?
Definitely! Kids love these sweet treats. Just keep an eye on the chocolate coating, as it can be a bit messy but oh-so-fun!
Final Thoughts
Creating these Chocolate Covered Cherry Brownie Bombs is more than just baking; it’s about sharing joy and sweetness with those you love. Each bite is a delightful explosion of flavors that can brighten even the busiest of days. Whether you’re treating yourself after a long week or impressing guests at a gathering, these little gems are sure to bring smiles. Plus, the ease of preparation means you can whip them up without stress. So, gather your ingredients, roll up your sleeves, and let the magic happen in your kitchen. Happy baking!
Print
Chocolate Covered Cherry Brownie Bombs: Indulge Today!
- Prep Time: 20 minutes
- Cook Time: 30 minutes
- Total Time: 50 minutes
- Yield: 24 brownie bombs 1x
- Category: Dessert
- Method: Baking
- Cuisine: American
- Diet: Vegetarian
Description
Chocolate Covered Cherry Brownie Bombs are decadent treats that combine rich brownie bites with a cherry filling, all coated in smooth chocolate.
Ingredients
- 1 box brownie mix
- 1 cup cherry pie filling
- 1 cup chocolate chips
- 1 tablespoon vegetable oil
- 1 teaspoon vanilla extract
- 1/4 cup powdered sugar (optional for dusting)
Instructions
- Preheat the oven according to brownie mix instructions.
- Prepare the brownie mix as directed on the box.
- Pour half of the brownie batter into a greased baking dish.
- Drop spoonfuls of cherry pie filling over the batter.
- Cover with the remaining brownie batter.
- Bake according to package instructions until a toothpick comes out clean.
- Let the brownies cool completely before cutting into bite-sized pieces.
- Melt chocolate chips with vegetable oil in a microwave or double boiler.
- Dip each brownie piece into the melted chocolate, ensuring it is fully coated.
- Place on a parchment-lined tray and refrigerate until the chocolate hardens.
- Dust with powdered sugar before serving, if desired.
Notes
- For a richer flavor, use dark chocolate chips.
- Store in an airtight container in the refrigerator for up to a week.
- These can be made ahead of time and frozen for later enjoyment.
Nutrition
- Serving Size: 1 brownie bomb
- Calories: 150
- Sugar: 12g
- Sodium: 50mg
- Fat: 7g
- Saturated Fat: 4g
- Unsaturated Fat: 2g
- Trans Fat: 0g
- Carbohydrates: 20g
- Fiber: 1g
- Protein: 2g
- Cholesterol: 15mg


