Introduction to No-Bake Pumpkin Cheesecake Balls
As the leaves turn and the air gets crisp, I find myself craving all things pumpkin. That’s where these delightful No-Bake Pumpkin Cheesecake Balls come in! They’re the perfect treat for busy days when you want something sweet without spending hours in the kitchen. With just a few simple ingredients, you can whip up a batch that will impress your family and friends. Plus, they’re a fantastic way to celebrate the flavors of fall. Trust me, these little bites of joy will have everyone asking for seconds!
Why You’ll Love This No-Bake Pumpkin Cheesecake Balls
These No-Bake Pumpkin Cheesecake Balls are a game-changer for anyone short on time but big on flavor. They come together in just 20 minutes, making them a quick solution for last-minute gatherings. The creamy pumpkin filling paired with a chocolate coating is a taste sensation that will have your taste buds dancing. Plus, they’re a fun, bite-sized treat that everyone will adore, from kids to adults!
Ingredients for No-Bake Pumpkin Cheesecake Balls
Gathering the right ingredients is the first step to creating these delightful No-Bake Pumpkin Cheesecake Balls. Here’s what you’ll need:
- Cream Cheese: This is the base of our cheesecake balls, providing that rich, creamy texture.
- Pumpkin Puree: The star of the show! It adds flavor and moisture, making these treats perfect for fall.
- Powdered Sugar: This sweetens the mixture and gives it a smooth finish. You can adjust the amount to your taste.
- Vanilla Extract: A splash of vanilla enhances the overall flavor, making each bite even more delicious.
- Pumpkin Pie Spice: This blend of spices brings warmth and that classic pumpkin flavor we all love.
- Graham Cracker Crumbs: These add a delightful crunch and help bind the mixture together. You can use store-bought or crush your own!
- Chopped Pecans (optional): For those who enjoy a bit of nutty texture, pecans are a fantastic addition.
- Chocolate Chips: Used for coating, they add a rich, sweet layer that perfectly complements the pumpkin filling.
For exact measurements, check the bottom of the article where you can find everything listed for easy printing. Feel free to get creative with your ingredients; after all, cooking is all about making it your own!
How to Make No-Bake Pumpkin Cheesecake Balls
Now that you have all your ingredients ready, let’s dive into the fun part: making these delightful No-Bake Pumpkin Cheesecake Balls. Follow these simple steps, and you’ll have a delicious treat in no time!
Step 1: Prepare the Cream Cheese Mixture
Start by taking your softened cream cheese and placing it in a mixing bowl. Add the pumpkin puree, powdered sugar, vanilla extract, and pumpkin pie spice. Using a hand mixer or a sturdy spatula, blend everything together until it’s smooth and creamy. This mixture is the heart of your cheesecake balls, so make sure it’s well combined!
Step 2: Add the Graham Cracker Crumbs
Next, gradually mix in the graham cracker crumbs. I like to add them in batches, stirring gently until everything is well combined. The crumbs will help bind the mixture and give it that classic cheesecake texture. You want it to be thick enough to hold its shape when you roll it into balls.
Step 3: Incorporate Optional Pecans
If you’re feeling adventurous, now’s the time to fold in those chopped pecans. They add a lovely crunch and a nutty flavor that pairs beautifully with the pumpkin. Just be gentle when mixing, so you don’t break up the pecans too much. If you prefer a smoother texture, feel free to skip this step!
Step 4: Chill the Mixture
Once your mixture is ready, it’s time to chill! Cover the bowl with plastic wrap and pop it in the refrigerator for about 30 minutes. This step is crucial as it helps the mixture firm up, making it easier to roll into balls. Plus, it gives the flavors a chance to meld together beautifully.
Step 5: Form the Balls
After chilling, take the mixture out of the fridge. Using a small cookie scoop or your hands, scoop out small portions and roll them into balls. Aim for about one inch in diameter. Don’t worry if they’re not perfect; the charm is in their homemade look!
Step 6: Melt the Chocolate
Now, let’s get to the chocolate! Place your chocolate chips in a microwave-safe bowl. Heat them in the microwave in 30-second intervals, stirring in between, until they’re completely melted. Alternatively, you can use a double boiler if you prefer. Just be careful not to overheat the chocolate!
Step 7: Coat the Balls
Once your chocolate is melted, it’s time to coat those pumpkin cheesecake balls. Dip each ball into the melted chocolate, making sure it’s fully coated. I like to use a fork for this part, allowing any excess chocolate to drip off. This creates a beautiful, smooth finish!
Step 8: Set the Coated Balls
Finally, place the coated balls on a parchment-lined baking sheet. Once all the balls are coated, pop them back in the refrigerator until the chocolate is set. This usually takes about 15-20 minutes. Once they’re ready, you can serve them chilled and watch everyone enjoy these delightful No-Bake Pumpkin Cheesecake Balls!
Tips for Success
- Make sure your cream cheese is softened for easy mixing.
- Chill the mixture long enough to make rolling easier.
- Use a cookie scoop for uniform ball sizes.
- Experiment with different coatings like crushed nuts or sprinkles.
- Store leftovers in an airtight container to keep them fresh.
Equipment Needed
- Mixing Bowl: A large bowl for combining ingredients. A sturdy pot can work in a pinch.
- Hand Mixer or Spatula: For blending the cream cheese mixture. A whisk can also do the job!
- Cookie Scoop: Helps in forming uniform balls. Your hands will work just fine too.
- Parchment Paper: For lining the baking sheet. Aluminum foil is a good alternative.
- Microwave-Safe Bowl: For melting chocolate. A small saucepan can be used for a double boiler method.
Variations
- Chocolate Pumpkin Cheesecake Balls: Mix in cocoa powder with the cream cheese mixture for a chocolatey twist.
- Gluten-Free Option: Use gluten-free graham cracker crumbs or crushed nuts instead of regular crumbs.
- Vegan Version: Substitute cream cheese with vegan cream cheese and use dairy-free chocolate for coating.
- Spiced Up: Add a pinch of cayenne pepper or cinnamon for an extra kick of flavor.
- Nut-Free: Omit the pecans and use sunflower seeds for a similar crunch without the nuts.
Serving Suggestions
- Pair these No-Bake Pumpkin Cheesecake Balls with a warm cup of spiced chai or apple cider for a cozy fall treat.
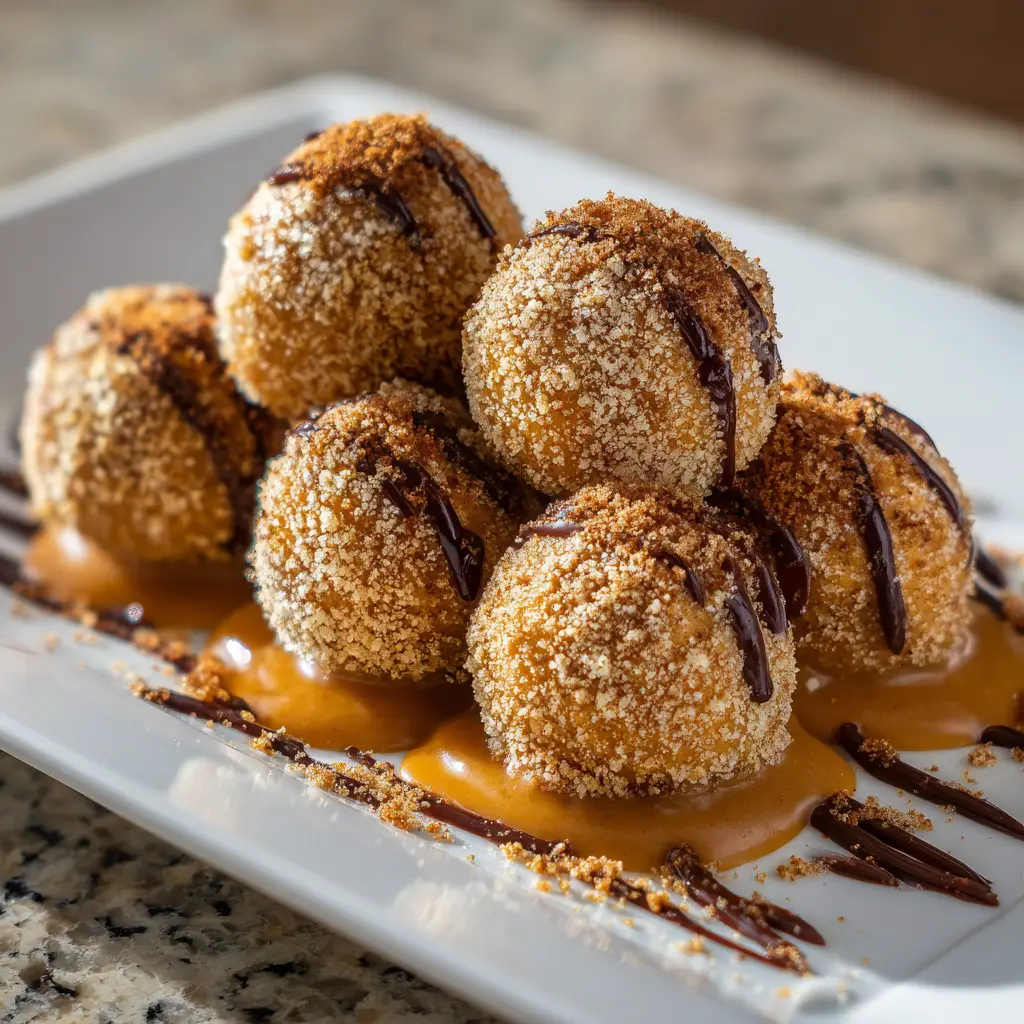
- Serve them on a festive platter, garnished with a sprinkle of cinnamon or a drizzle of caramel sauce.
- For a fun twist, place them in mini cupcake liners for easy serving at parties.
- These bites also make a delightful addition to a dessert table during holiday gatherings.
FAQs about No-Bake Pumpkin Cheesecake Balls
Can I make No-Bake Pumpkin Cheesecake Balls ahead of time?
Absolutely! These delightful No-Bake Pumpkin Cheesecake Balls can be made a day or two in advance. Just store them in an airtight container in the refrigerator until you’re ready to serve. They actually taste even better after the flavors have had time to meld!
How do I store leftovers?
Leftovers can be stored in an airtight container in the refrigerator for up to a week. Just make sure they’re well covered to keep them fresh. You can also freeze them for longer storage; just let them thaw in the fridge before enjoying!
Can I use a different coating instead of chocolate?
Definitely! While chocolate adds a rich flavor, you can get creative with your coatings. Try rolling them in crushed nuts, sprinkles, or even shredded coconut for a fun twist. The possibilities are endless!
What can I serve with these cheesecake balls?
These No-Bake Pumpkin Cheesecake Balls pair wonderfully with a warm drink like spiced cider or coffee. You can also serve them alongside fresh fruit for a refreshing contrast. They make a lovely addition to any dessert platter!
Are these cheesecake balls suitable for a gluten-free diet?
Yes! You can easily make these No-Bake Pumpkin Cheesecake Balls gluten-free by using gluten-free graham cracker crumbs or crushed nuts instead. Just check the labels to ensure all your ingredients are gluten-free!
Final Thoughts
Creating these No-Bake Pumpkin Cheesecake Balls is more than just whipping up a dessert; it’s about embracing the warmth of the season and sharing joy with loved ones. Each bite is a delightful reminder of cozy fall evenings and festive gatherings. Whether you’re serving them at a holiday party or enjoying them as a sweet treat after dinner, they’re sure to bring smiles all around. Plus, the ease of making them means you can focus on what truly matters—making memories with family and friends. So, roll up your sleeves and dive into this delicious adventure!
Print
No-Bake Pumpkin Cheesecake Balls You Need to Try Today!
- Prep Time: 20 minutes
- Cook Time: 0 minutes
- Total Time: 50 minutes
- Yield: 24 balls 1x
- Category: Dessert
- Method: No-Bake
- Cuisine: American
- Diet: Vegetarian
Description
Delicious and easy-to-make no-bake pumpkin cheesecake balls that are perfect for fall and holiday gatherings.
Ingredients
- 8 oz cream cheese, softened
- 1 cup pumpkin puree
- 1/2 cup powdered sugar
- 1 tsp vanilla extract
- 1 tsp pumpkin pie spice
- 1 cup graham cracker crumbs
- 1/2 cup chopped pecans (optional)
- 1/2 cup chocolate chips (for coating)
Instructions
- In a mixing bowl, combine softened cream cheese, pumpkin puree, powdered sugar, vanilla extract, and pumpkin pie spice until smooth.
- Gradually mix in the graham cracker crumbs until well combined.
- If desired, fold in chopped pecans for added texture.
- Refrigerate the mixture for about 30 minutes to firm up.
- Once chilled, scoop out small portions and roll them into balls.
- Melt chocolate chips in a microwave or double boiler.
- Dip each pumpkin cheesecake ball into the melted chocolate, ensuring they are fully coated.
- Place the coated balls on a parchment-lined baking sheet and refrigerate until the chocolate is set.
- Serve chilled and enjoy!
Notes
- Store leftovers in an airtight container in the refrigerator for up to a week.
- These can be made ahead of time and frozen for later use.
- Feel free to customize the coating with crushed nuts or sprinkles.
Nutrition
- Serving Size: 1 ball
- Calories: 120
- Sugar: 8g
- Sodium: 50mg
- Fat: 7g
- Saturated Fat: 4g
- Unsaturated Fat: 2g
- Trans Fat: 0g
- Carbohydrates: 12g
- Fiber: 1g
- Protein: 2g
- Cholesterol: 20mg


